Hi All,
Firstly if you haven't already I advise that you read this blog on Aperture Priority and then come back here.
So having mastered Aperture Priority Mode, it's now time to take a look at the possibilities that using Shutter Priority can bring!
Firstly how does Shutter Priority Mode work? Well it's really just the opposite of Aperture Priority. You select the shutter speed and the camera adjusts the Aperture.
Shutter Priority is generally for when we go to the extremes of super fast shutter speeds to freeze action, or slow shutter speeds to show motion blur, or super slow to show stars moving in the night sky or make waves on the sea look like smoke.
Why would we use this mode? Here's a couple of examples...
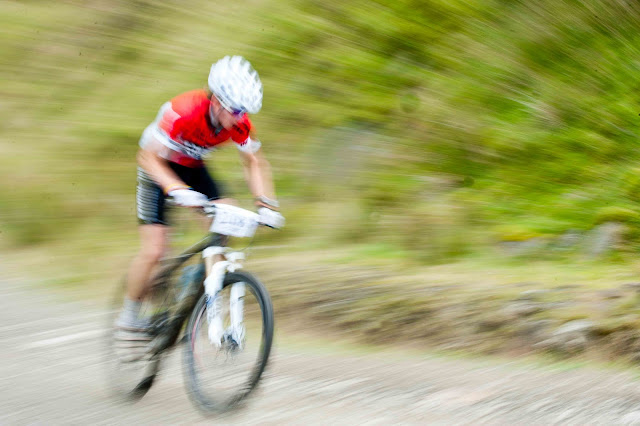
To convey speed. This shot was actually achieved by zooming out whilst the shot was being taken, giving it a bit of a warp speed effect.
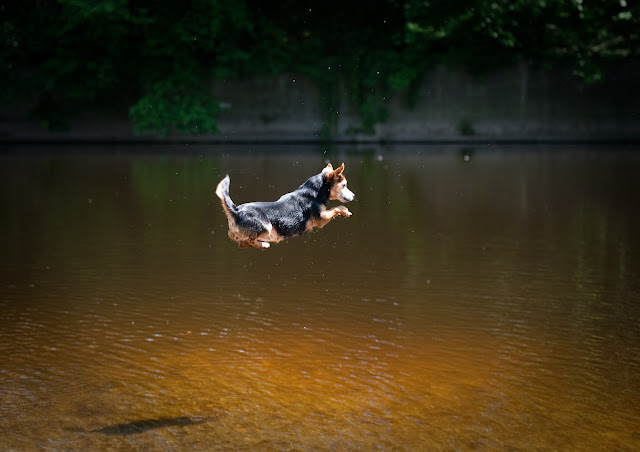
To freeze action. Shutter speeds up in the thousandths of a second can really capture a moment in time. This is how you'd capture drops of water flying off a dogs shaking head. In order to get really fast shutter speeds you will need a lot of light. So bright days, studio lights and larger apertures will all help you get images at super fast shutter speeds.
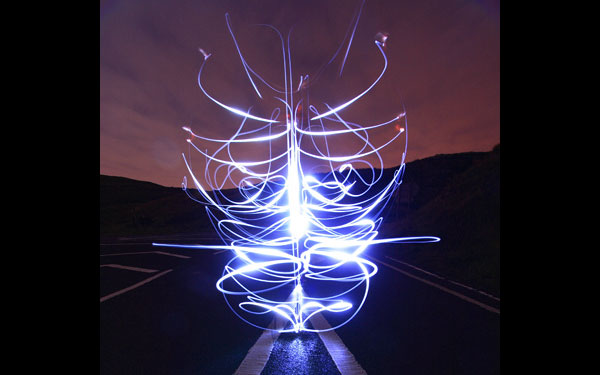
Light painting. Great fun! You need a tripod for this and long shutter speeds of between 5 and 30 seconds (you can go longer). This image will have been taken using something like a simple flash light. Over a 10 second exposure the camera will only record the light source, the person holding the light cannot be seen as they are not bright enough to be recorded and they would have been in constant motion. The brighter parts of the line will have been created by pointing the light source directly at the camera.
Landscape photographers often use slow shutter speeds in order to create this smoky effect. The picture was taken over such a long time that the sea will have come in and gone out many many times. Filters are uses to reduce the light intensity and provide even longer exposures to capture images like this.
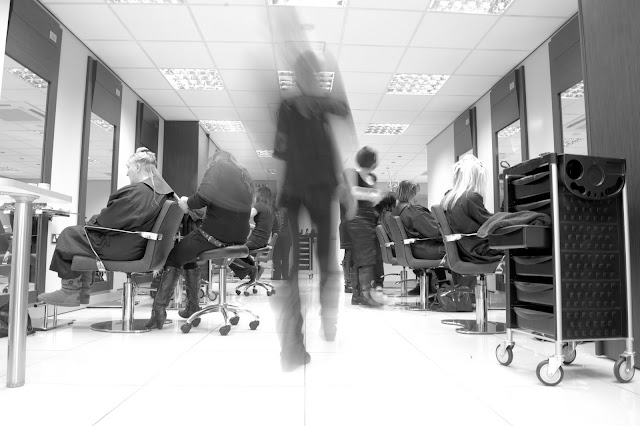
A tripod is used here to keep the background sharp. The shutter speed was set to around about 1 second to allow enough time for motion to be blurred.
These types of shots can take a bit of practice and a few attempts to get them right. The results are well worth the effort but can only be achieved by having full control of the shutter speed.
In future I will post articles on precisely how to do each type of shot.
In the mean time just have a play and see what you can do. It's excellent fun and really rewarding when you start to get it right.
Thursday, 26 January 2012
Shooting In Aperture Priority Mode: Using Depth of Field
Greetings!
Today I want to talk a little bit about the Aperture Priority mode on SLR camera's. Learning how to use this really opened photography up for me and started me on a much more creative and fulfilling path.
The Aperture is the hole in a lens that light travels through before it reaches the shutters in SLR camera's. Using your camera in Aperture Priority gives you the freedom to move through the lenses different aperture settings without having to worry about the shutter speed.
Understanding how to use it will enable you to do shots like this where only a precise part of the image is in focus.
This is known as having a Shallow Depth of Field. It was shot with a large aperture. F1.4 (small F numbers mean large Aperture's).
And shots like this. Expansive depth of field. Landscape photographers use a large depth of field so that they can have items in the foreground in focus as well as items in the background. This was shot at the smallest Aperture possible for the lens F22 (Large F numbers mean Small Apertures).
In Aperture Priority Mode, the aperture you select will be matched by the camera to a shutter speed that will give a good exposure.
It's important to understand that the size of the Aperture affects the amount of light potentially hitting the sensor. A large Aperture lets in more light than a small one.
With a small aperture (F22) the camera needs to compensate with a longer shutter speed. This is because the hole is small and lets in less light so it takes longer to create an image on the sensor.
Conversely with a large aperture (F1.4) the camera compensates by speeding up the shutters to stop too much light getting in and Over Exposing the image.
So remember this...
LARGE APERTURE = SMALL F NUMBER (F1.4), BLURRED BACKROUND AND FAST SHUTTER SPEEDS
SMALL APERTURE = LARGE F NUMBER (F22), SHARP BACKROUND AND SLOWER SHUTTER SPEEDS
This is why landscape photographers will tend to use tripods. Slower shutter speeds will cause camera shake and blurred images. Using a tripod allows hugely slow shutter speeds of minutes and eliminates shake.
It's also how photographers freeze action. But more on this in the next section that covers Shutter Priority, S or Tv (time value) mode.
Here is a graphical representation of depth of field.
And here is another highlighting an important point.
In this second diagram point B identifies the focus point. Notice how this is not in the centre of the focal plane (area in focus). This is why good landscape photographers focus on a point that is a third in in the image. It's also useful to know if you are ever taking group shots. Make sure that you always focus on someone in the front row, as at wide apertures may find people in the background to be slightly blurred!
A final point with Aperture priority is that it's great for creative portraits and low light shooting.
To create even more of a blurred background stand closer to the subject. The closer you are the more bokeh you'll get.
If you find yourself in low light then open the Aperture as wide as you can. Check your shutter speed. If it is above the focal length (you'll see that on your lens in millimeters) then you are lightly to be able to get a shot without camera shake. If shutter speed is below the focal length then up your ISO until it is.
I love Aperture priority particularly because I love blurred backgrounds. They make the subject stand out from the background and can often yield dreamy results. The blurred effect is often called "bokeh" (pronounced boke - eh).
Here's a nice example...
Friday, 6 January 2012
How to Shoot a Composite Image
Here's a fun and easy way to create really interesting and unique images.
You need a tripod, a wide angle lens, a speedlight (you may get away without depending on the lighting conditions), some willing subjects and a handfull of rather straightforward photoshop techniques.This blog is just about how to set up and shoot an image like this, the next will cover the photoshop techniques you will need.
Once you are happy with the process and your settings you will quickly realise that the trick is to take enough shots to give you a degree of compositional freedom in post processing, but not too many that the selection process and compositing becomes arduous.
Have fun capturing your images for your composite shot. People tend to love these so it is well worth having a go.
I'll be back in a couple of days with the second half of this blog dealing with how to knit together the images that you have taken to result in a masterpiece composite.
You need a tripod, a wide angle lens, a speedlight (you may get away without depending on the lighting conditions), some willing subjects and a handfull of rather straightforward photoshop techniques.This blog is just about how to set up and shoot an image like this, the next will cover the photoshop techniques you will need.
- A little bit of planning will help so have a good think about the scene that you're intended to shoot. You don't need to go overboard but just remember that an interesting shot of this type will generally have things happening in the background, midground and forground.
- Set your camera up on a tripod in a corner of the room, go as wide as you can with your lens (this was shot at 24mm with a 24 - 70) and if you can, shoot a speedlight through an umbrella in the corner of the room that isn't in the shot. So in the shot above I had one light to my right which was as high as I could get pointing diagonally into the room.
- You will need to have everything in focus whilst shooting so reduce your aperture to the smallest you can get away with...so that's the larger numbers. Around F18 will probably do. At these apertures you will very easily get blurred images so it is imperative that you use a tripod to stop camera shake.
- Keep your ISO as low as you can.
- Take a shot of the room with no one in it. Focus on something mid way in the room if possible - this will help you have all of the room in focus. This image can be used as a canvas to then layer images of people over the top. Once you have the background you can open up the aperture a bit. The people in the shot were taken at f5 at a 60th of a second with flash to freeze the action.
- The next bit is the fun bit. What you'll need to do is try and imagine the scene as discrete areas of action that you'll want to join together. So with this scene I had each person on their own in the room and got them to move clockwise (counter clockwise works just as well) taking on different poses as they went and making sure that the interesting action happened in the mid, back and foreground.
- Whilst taking the pictures be sooo very careful that you don't knock the camera. Use the focus points to track your subjects around the room. It's tricky but with a bit of practice you'll get there.
- Step 6 was actually just a bit of an insurance policy. Those images can be used to fill gaps. If you are lucky you will be able to create your image with just 3 or 4 mini group shots. The way to do this is to have all your subjects in one area doing different things. So for the shot above I had the three of them on the couch and took 3 or four shots of them jumping about and messing around. I then moved them to the next couch took 3 or four shots and so on. Working them around the room making sure each section of the room was covered.
Once you are happy with the process and your settings you will quickly realise that the trick is to take enough shots to give you a degree of compositional freedom in post processing, but not too many that the selection process and compositing becomes arduous.
Have fun capturing your images for your composite shot. People tend to love these so it is well worth having a go.
I'll be back in a couple of days with the second half of this blog dealing with how to knit together the images that you have taken to result in a masterpiece composite.
Wednesday, 7 December 2011
Digital SLR Photography Training: Manifesto
Greetings Comrades,
I am a professional photographer and during the course of my own personal development I have been disappointed and often appalled at the quality of training (both commercial and free) that is out there for both amateur and professional alike.
At the moment we are experiencing a revolution in the world of photography. It is a fantastic and liberating time. In truth almost everyone is a photographer now, due mainly to the ubiquity of mobile phones and the breathtaking advancement of digital technology. My belief is that anybody with a bit of guidance is capable of creating amazing images.
Right now people are getting access to quality SLR cameras and discovering their creative potential. Post production software is becoming increasingly affordable, available and easier to use. We are at a point where anyone can get their hands on gear that is capable of producing incredibly quality images, they just need to be shown how to use it.
Here's the main problem as I perceive it. Loads of talented people, loads of decent equipment, hardly any decent training resources. It's as simple as that. The net is awash with free advice, tutorials, video training and the like. Some is good, some great some funny but most pretty awful. If you are like me you will have found it frustrating trying to accessing straightforward information. There are so many blind alleys and time wasters. I love learning by using You Tube, but please just GET TO THE POINT!! These people may know their stuff (although that's not a given) but they know nothing about training or how people actually absorb information.
Ok well what about getting some proper hands on tuition? For sheer expedience or maybe out of frustration (or both if you're me) you may put your hand in your pocket and source some professional training. I personally have attended many training courses and seminars and will continue to do so. However, having done this my overall impression is that no one is doing a good job at coming up with the goods. Again its the same as on the net but in some ways worse. Usually with a little bit of thought and structure the material could have been distilled, delivered in a quarter of the time and had twice the impact. These people are not professional trainers though, and truth be known many still guard their secrets.
So with all that in mind and over ten years experience in training I decided it was time to try and change things. I want to build a community around a free resource that is accurate, concise, fun and ever expanding. I want to document my learning and the learnings of others in such a way that allows people excel quickly at this art without wasting hours listening to egocentric (and yes, many times funny) half baked photographers. I also want to meet like minded people who are as passionate about their art as I am. I want you to join me.
If you agree with these sentiments and want progress quickly in the world of photography then please do visit the site, join the forum and feel free to make requests for content.
This is just the start but it is happening so watch this space...
All the best
Polo
Subscribe to:
Posts (Atom)